How to use a custom domain for your handle on BlueSky
Intro
This guide assumes that you have already created a Bluesky account. At the time of writing this, there are 2 ways to have done so (either through invite codes, or by getting picked off the waitlist). Once you have initially created your account, you can get started customizing your handle!
Note: this guide is for users with domains managed with Google Domains. The steps will be similar no matter where your domain lives, but some screens/inputs may look different.
Guide
- Once logged in to Bluesky, go to Settings and select
change handle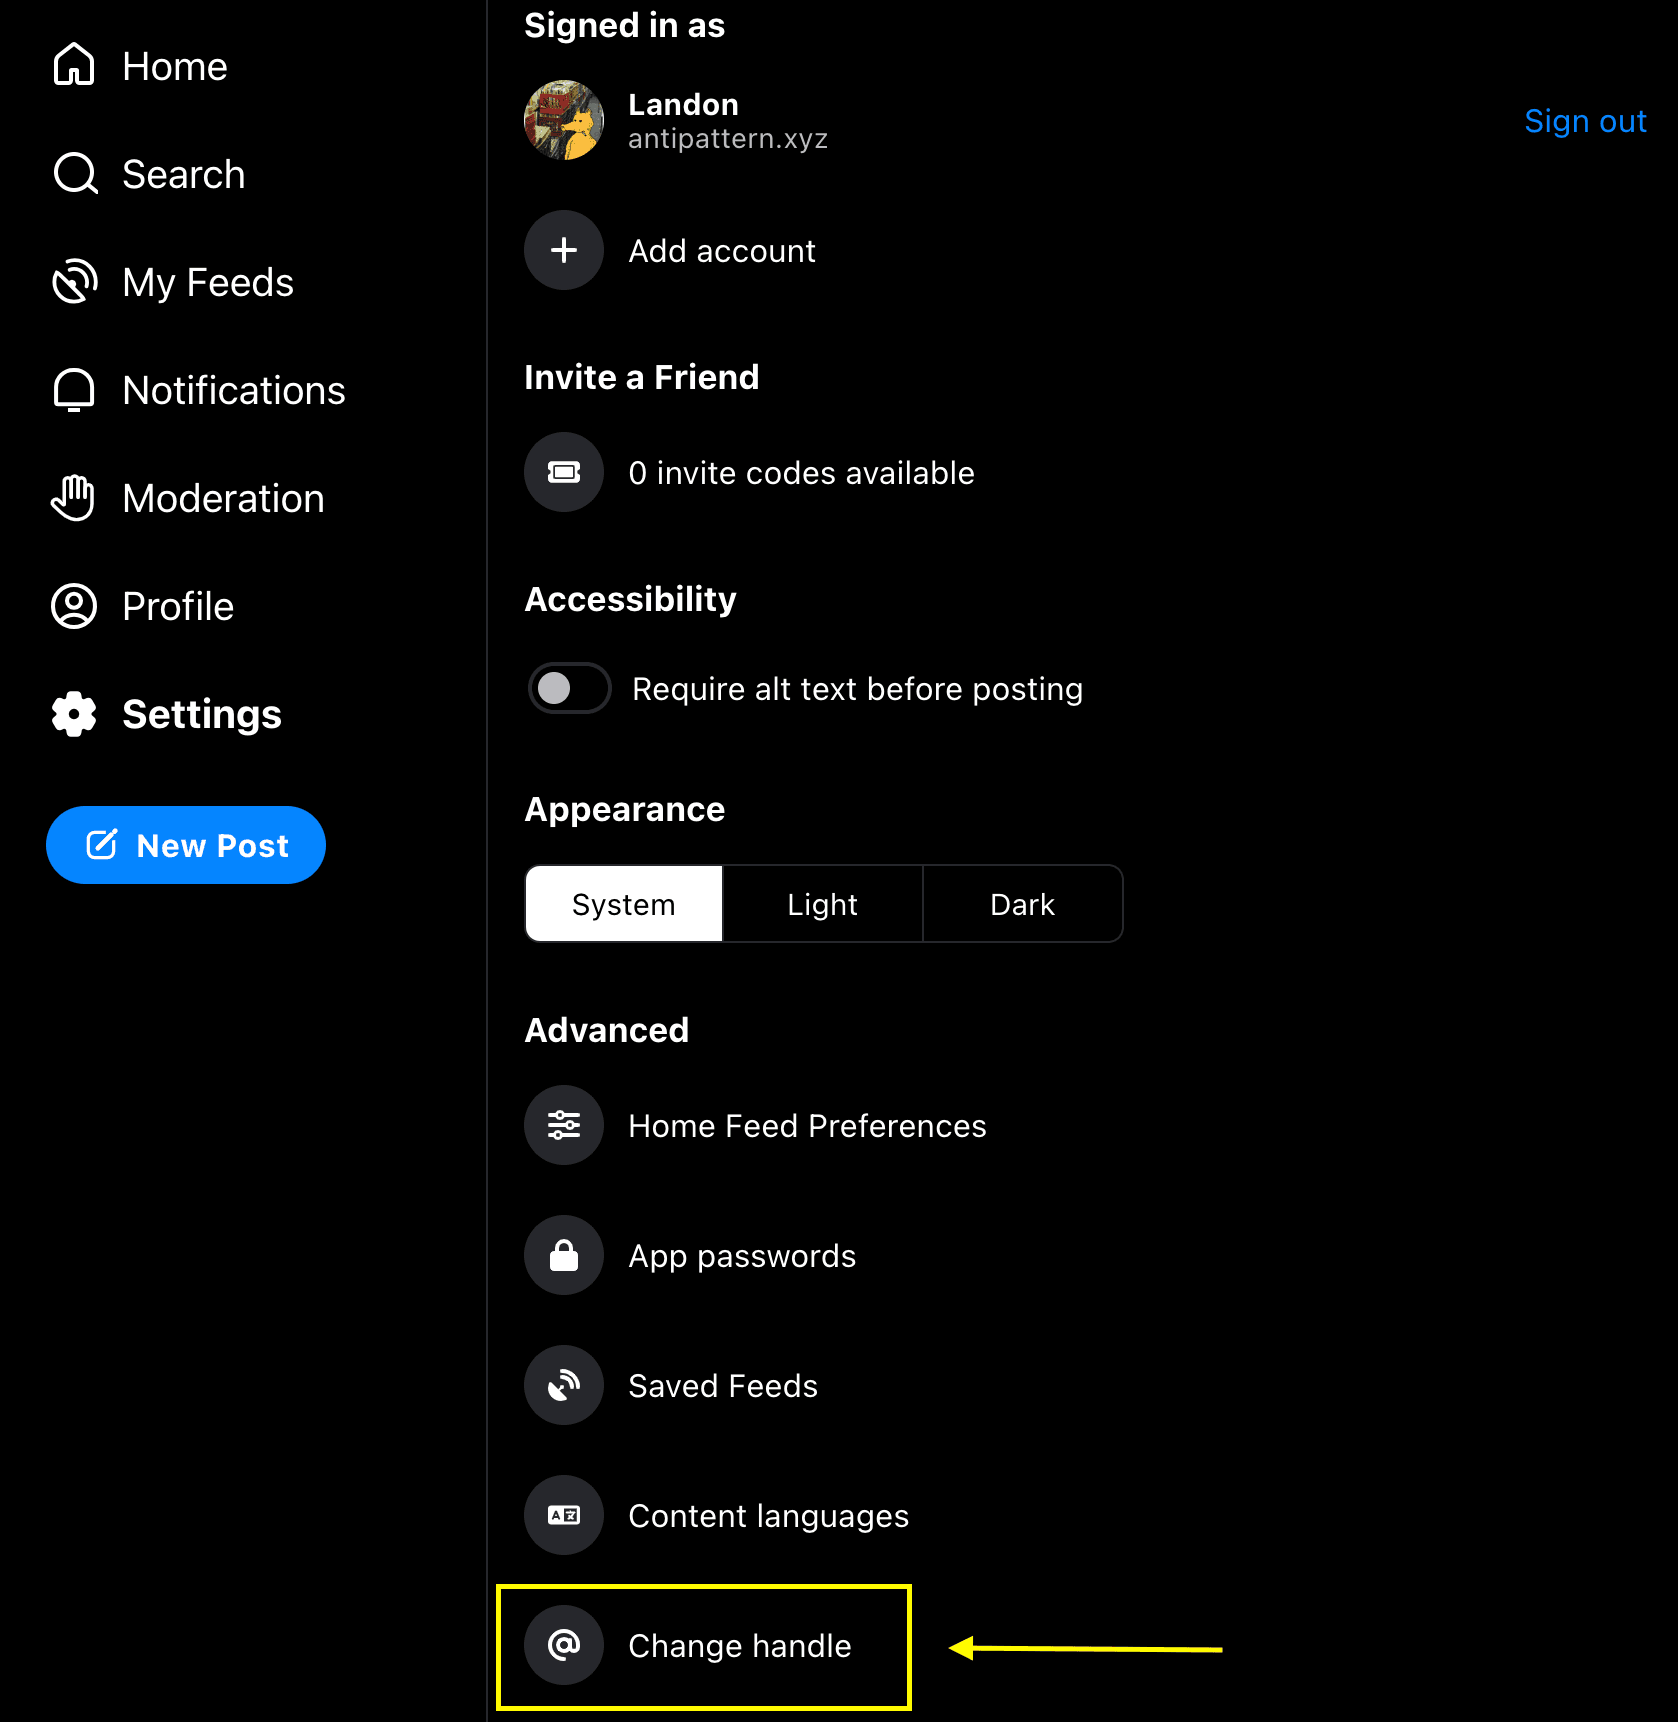
- Select
I have my own domain - You will now see this modal with a bunch of DNS config information
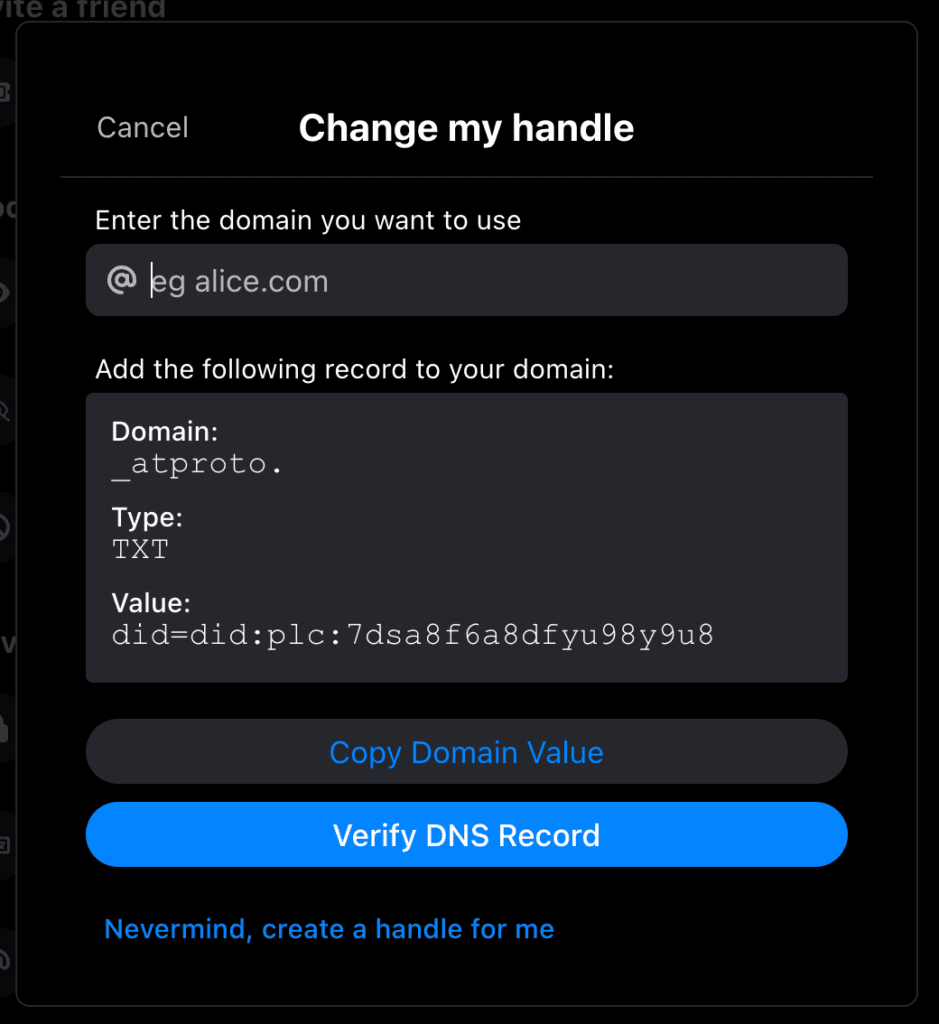
- Type your (full) domain in the top input. (Example: I put
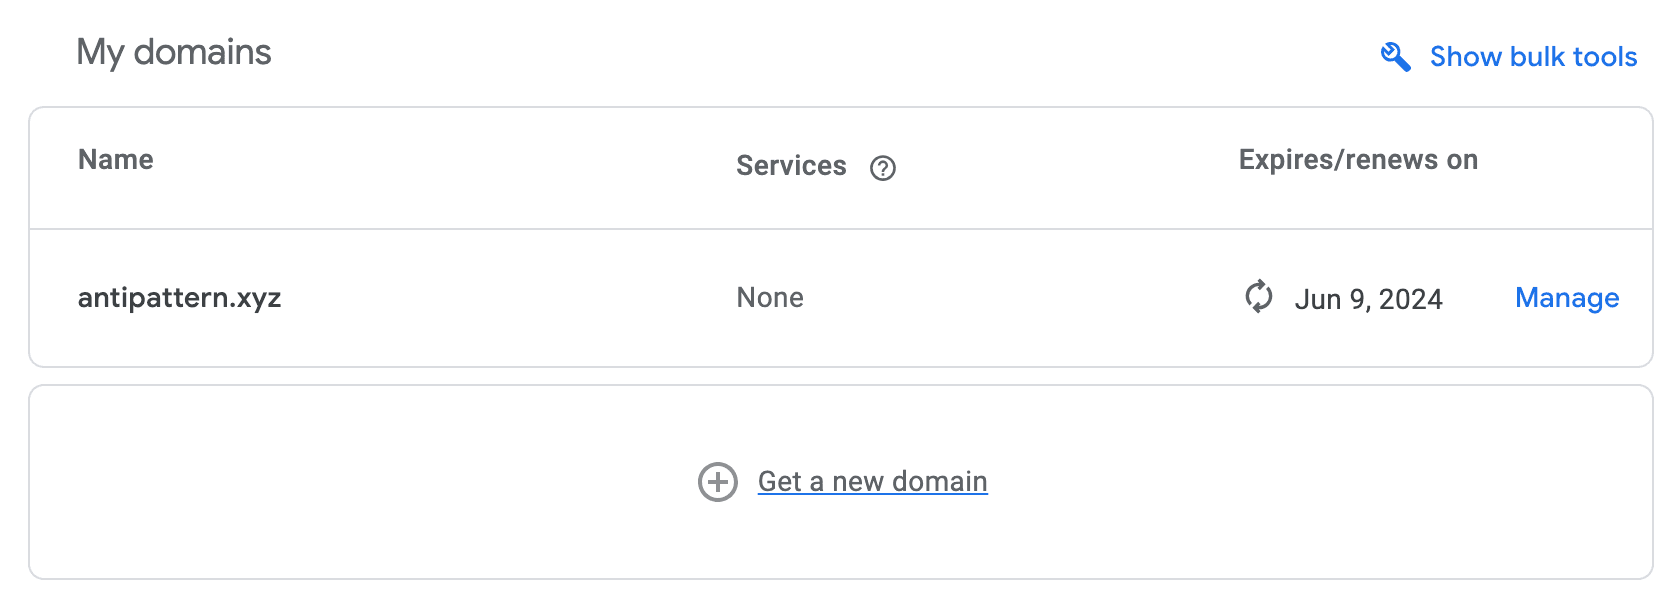
antipattern.xyz) - Head over to Google Domains and click
My domains - Select which domain you want to use on Bluesky
- Click
DNSon the left side bar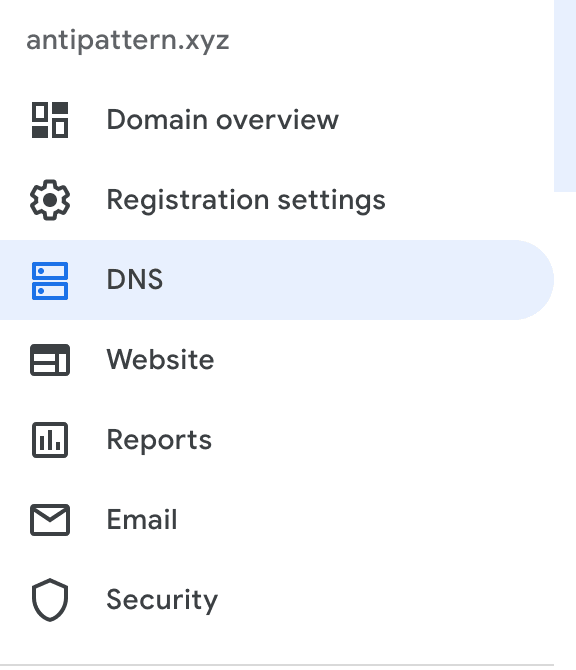
- Under
Resource records, clickManage custom records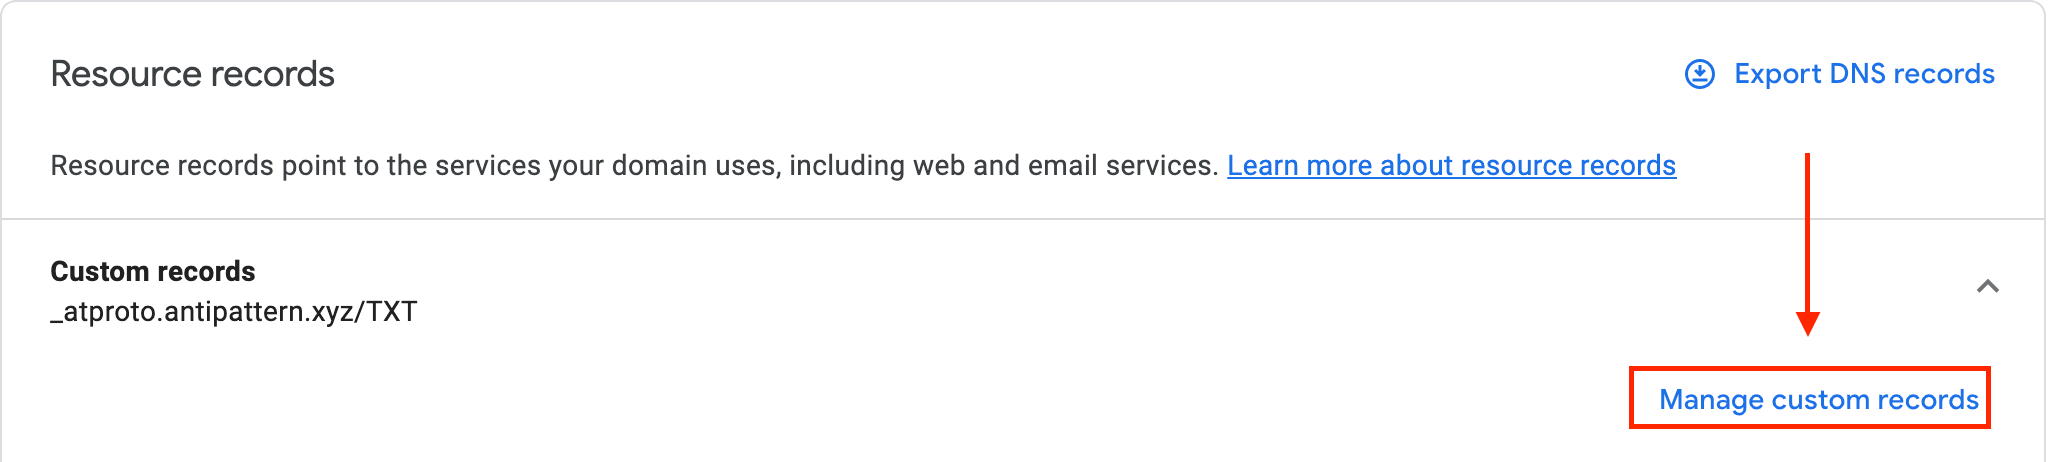
- Add the following fields using the inputs and dropdowns. Paste the
valuefrom Bluesky (see step 2 image) into theDatatext input. - Save your changes to the DNS settings.
- Wait ~5 minutes for changes to propagate across the internet
- Go back to Bluesky and click
Verify DNS Record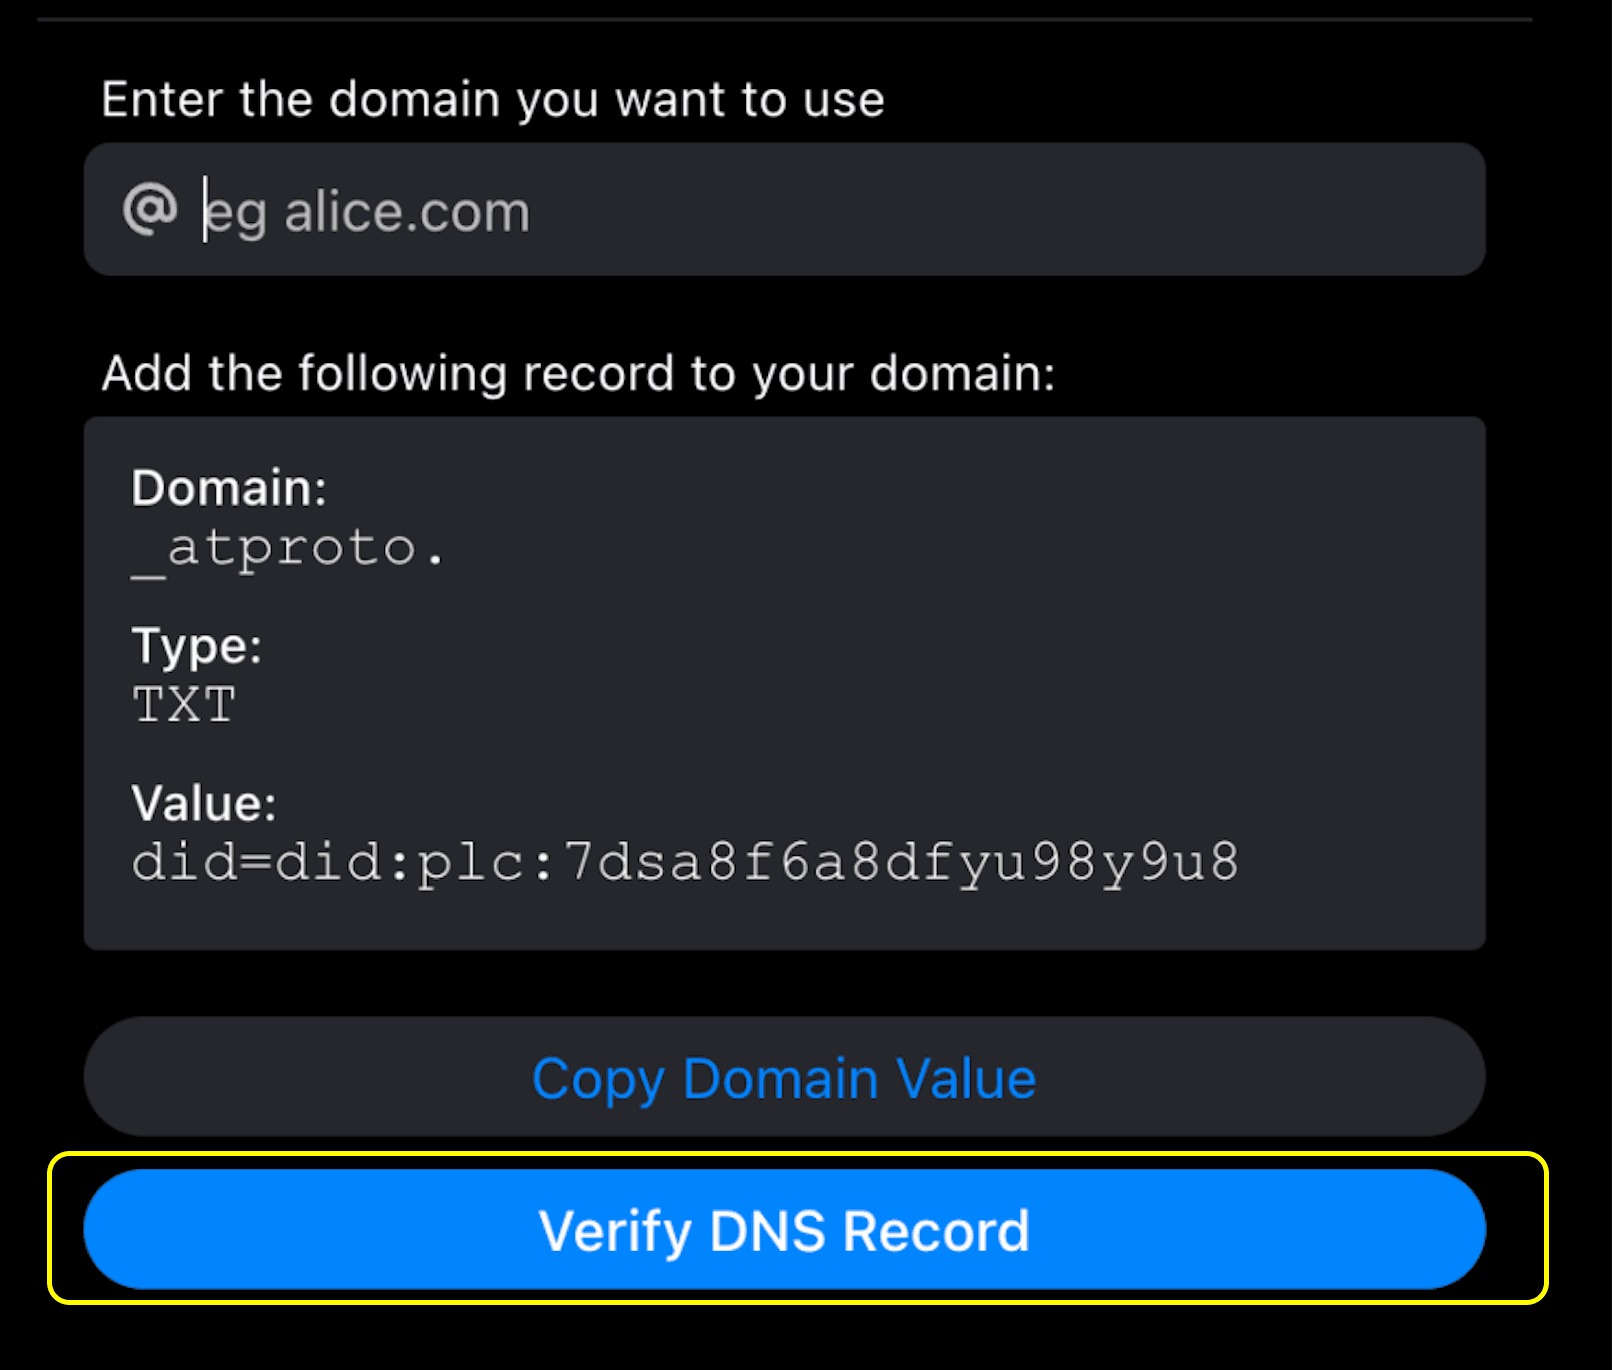
- After verifying the changes, your Bluesky handle will now be changed to the domain that you own!